Microsoft now offering mail service for any of your domain for free using Windows Live Admin Center
Details:
You can use Windows Live Admin Center to create personalized e-mail addresses for your domain name for free, so you don’t have to pay anything for this. Really cool service from Microsoft.
With Windows Live Admin Center, you can:
- Use your own custom domain name to send and receive e-mails and instant messages.
- Receive 5 gigabytes (GB) of Inbox storage space for each of your accounts with Windows Live Hotmail.
- Check your e-mail from any computer that is connected to the Internet.
- Control junk e-mail with Microsoft SmartScreen technology (Machine learning technology that uses a probability-based algorithm to determine whether e-mail messages are legitimate or spam.) .
- Take advantage of e-mail virus scanning and cleaning services.
- Get lots of e-mail accounts for your domain. If you need more accounts, you can apply to receive an unlimited number.
- Create a custom web address that links to your Windows Live Space.
- Manage your custom domain name using the Admin Center website, or create your own programs with the Windows Live Admin Center software development kit (SDK).
- Create an advertisement module on your website so that users can sign up for an e-mail account on your domain. For more information.
====
Few steps to set up everything easily.
1. Register your domain from any domain service provider, for eg. Domain199
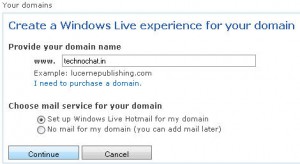
2. Now go to http://domain.live.com register or signup if you already have your live ID. Then put your domain name and click accept.
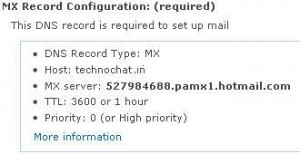
3. Now you will get following error screen until you configure MX record for your domain.
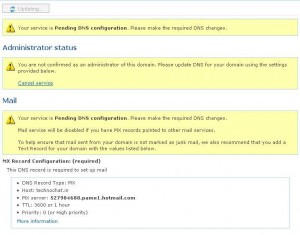
4. Now set MX Record on your Domain CP.
5. If you don’t have access to configure any DNS entry on your settings, then do following steps.
6. Go to EveryDNS and register your account. Create DNS entry for your domain,
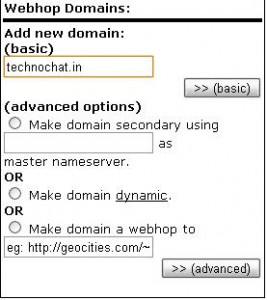
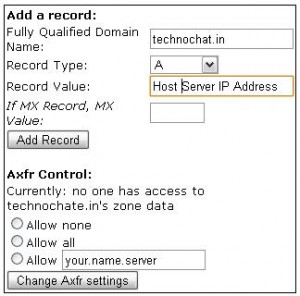
7. Remove all existing record. And add A Record of your domain name and its hosting IP address..
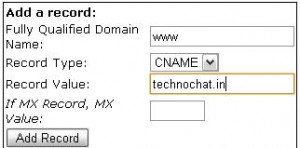
8. Add a CNAME Record, where, name is www and record value is your domain.
9. Add following four name server on your domain nameserver field from you domain control panel.
ns1.everydns.net
ns2.everydns.net
ns3.everydns.net
ns4.everydns.net
10. Now again logon to your EveryDNS and set MX Record.
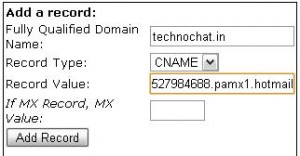
All Done, now wait for max 24 hours to sync.
After it sync, your stats will be changed to active.

Now you can set custom address for mail logon, for eg. http://email.technochat.in
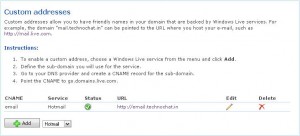
also you have to set a CNAME Entry for this in your domain settings or on your EveryDNS settings.
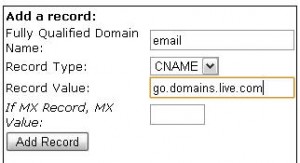
Your setting will be looks like following on EveryDNS
Host | Type | Value | MX | TTL | Delete |
email.technochat.in | CNAME | go.domains.live.com | 3600 | [delete] | |
technochat.in | A | XXX.XXX.XXX.XXX | 3600 | [delete] | |
technochat.in | MX | XXXXXX.pamx1.hotmail.com | 0 | 3600 | [delete] |
www.technochat.in | CNAME | technochat.in | 3600 | [delete] |
Enjoy this cool service from Microsoft.
Disclaimer: All posts and opinions on this site are provided AS IS with no warranties. These are our own personal opinions and do not represent our employer’s view in any way.
This article currently have 7,448 views
![]() This work is licensed under a Creative Commons Attribution-NoDerivatives 4.0 International License.
This work is licensed under a Creative Commons Attribution-NoDerivatives 4.0 International License.
Thanks so much for the tutorial!