The reason behind writing this article is to use my Laptop (having Intel i3 4th Gen and 8 GB of RAM) as my LAB for testing new Windows Server 2016 TP4 and to do that I have to use boot from VHD option. There are multiple ways to boot your system from VHD but I don’t find a simple and effective one. Second reason is I wanted to boot the Windows Server 2016 TP4 with GUI (aka Desktop Experience), coz I like the new Windows GUI.
So, let’s get started.
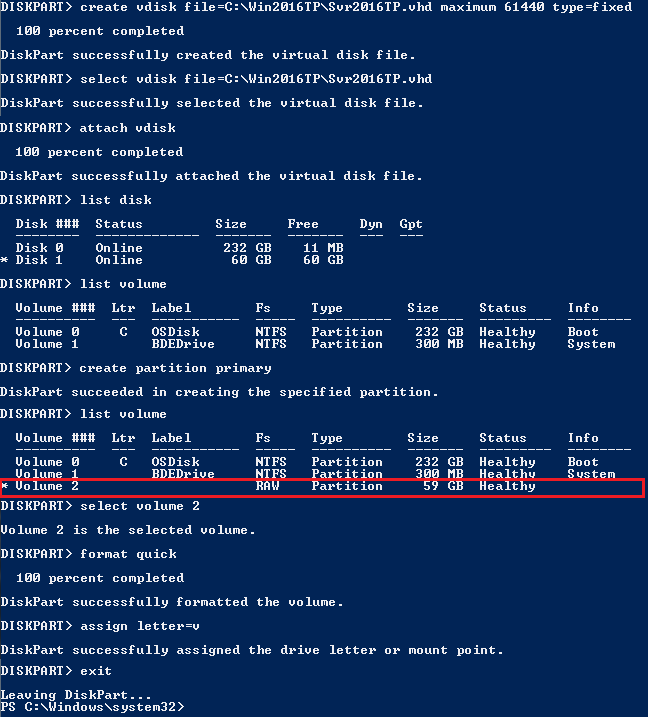
First, you have to download the Windows Server 2016 TP ISO from here. Once downloaded, extract the ISO content to a folder (I have extracted to C:\MyData\WinSvr2016). Now you have to create a VHD and mount it with any available drive letter (I selected V). Use the following set of command one by one from PowerShell or Command prompt with administrative privilege.
diskpart
create vdisk file=Drive:\FolderName\VHDName.vhd maximum 61440 type=fixed
select vdisk file= Drive:\FolderName\VHDName.vhd
attach vdisk
list disk
list volume
create partition primary
list volume
select volume NewVolumeNumber
format quick
assign letter=DriveLetter
exit
DEMO 1
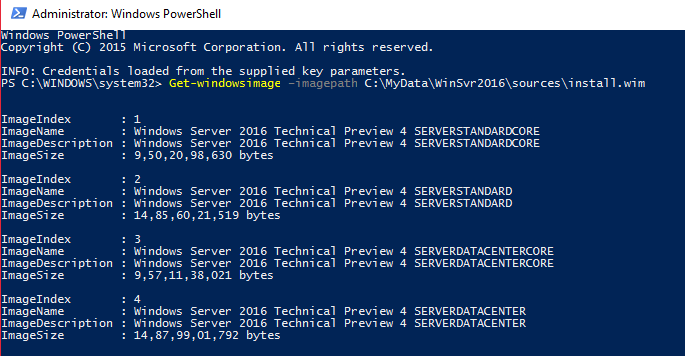
You have to make sure which version you want to deploy of your newly created VHD, which is mounted as V. To get the available options use following command.
Get-windowsimage –imagepath C:\MyData\WinSvr2016\sources\install.wimDEMO 2
To deploy image to you have to execute following command from PowerShell and wait till it completed successfully. I have selected Index 4 as I want to install Windows Server 2016 TP Datacentre Edition with GUI (aka Desktop Experience).
Expand-WindowsImage -ImagePath "C:\MyData\WinSvr2016\sources\install.wim" -ApplyPath "V:\" -Index 4DEMO 3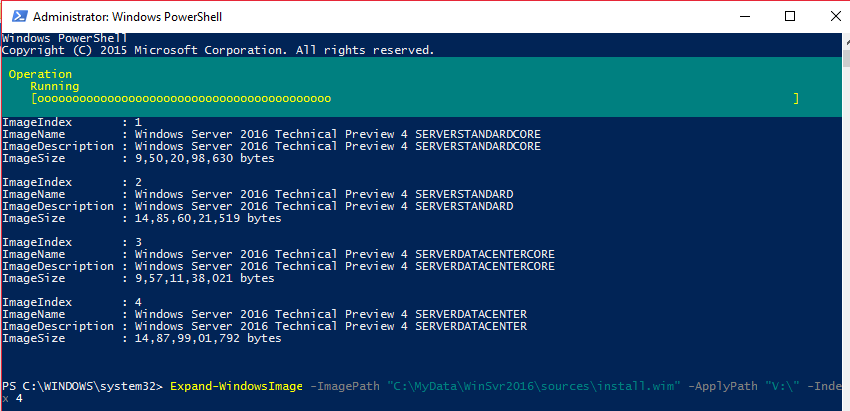
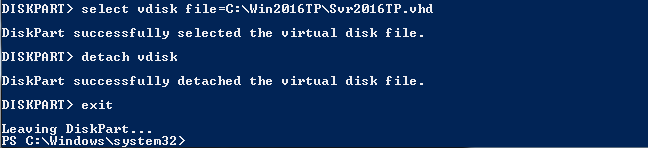
Once the image gets deployed, you have to detach that volume.
diskpart
select vdisk file=C:\Win2016TP\Svr2016TP.vhd
detach vdisk
exit
DEMO 4
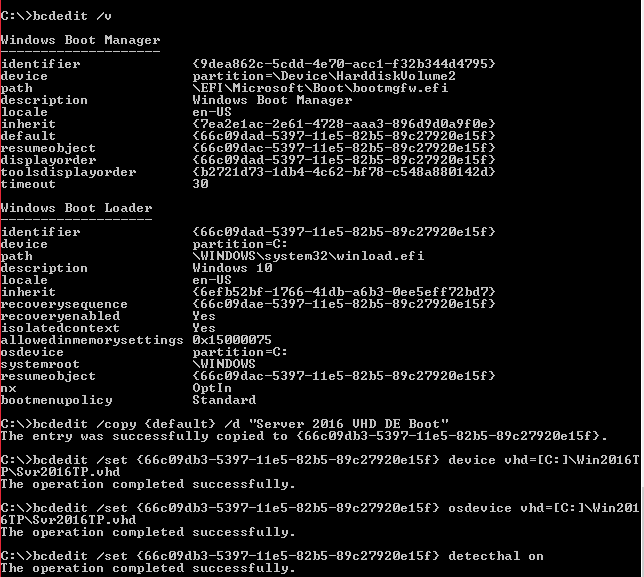
Now you have to create duplicate boot entry using BCDEDIT. Use the following commands one by one to create the boot entry for Windows Server 2016 TR (I have created Server 2016 VHD DE Boot).
bcdedit /v
bcdedit /copy {default} /d "Server 2016 VHD DE Boot"
bcdedit /set {NEW Identifier} device vhd=[Drive:]\Folder\VDisk.vhd
bcdedit /set {New Identifier} osdevice vhd=[Drive:]\Folder\VDisk.vhd
bcdedit /set {New Identifier} detecthal on
DEMO 5
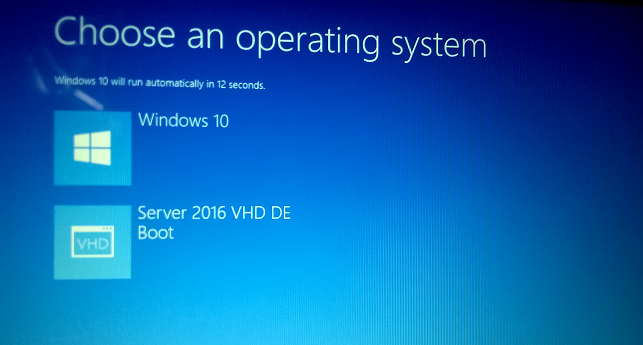
Everything is set, now reboot your system and select the VHD boot from your boot menu to boot Windows Server 2016 TP.
DEMO 6
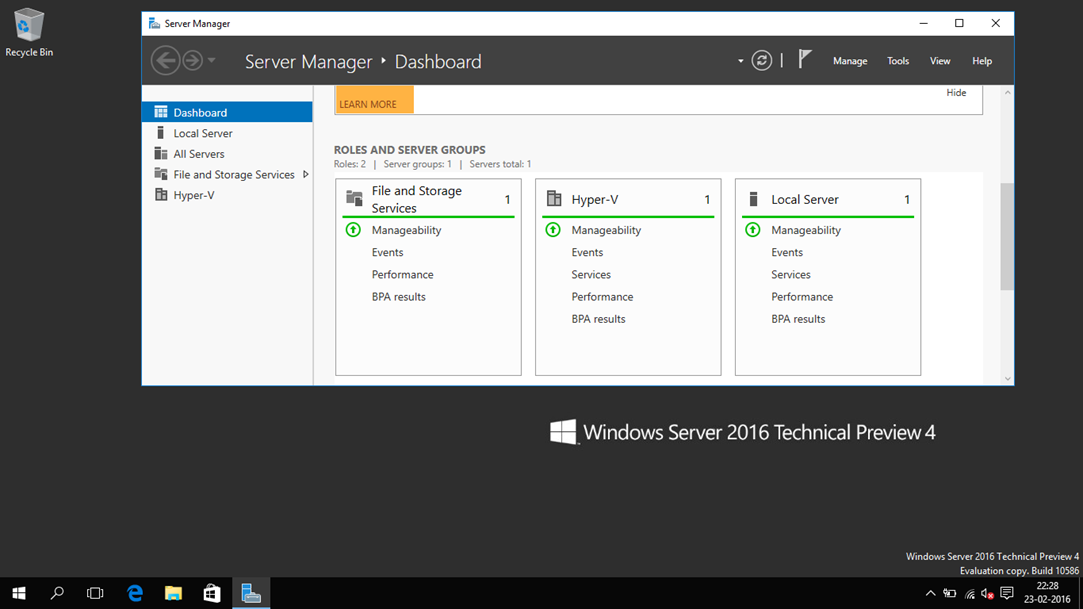
This will take some time to loading, just sit back and wait till you get the welcome screen (there might be some reboot is required during this activity.)
DEMO 7
Note: If you are using only WiFi, then you have to enable Wireless Lan by using following command from PowerShell.
Add-WindowsFeature wireless-networkingThanks 🙂

The Credential-Free Watchdog: Mastering Event-Driven App Automation
We have all been there. You are an automation lover. You have…

Microsoft Teams’ Efficiency Mode Arrives for Low‑End Devices
Microsoft is rolling out an Efficiency Mode for Microsoft Teams designed to…

Anthropic and Amazon Expand Partnership, Securing Up to 5GW of Compute for Claude
Anthropic announced on April 20, 2026, a major expansion of its collaboration…

How Attackers Abuse Microsoft Teams and Quick Assist: Inside the Helpdesk Impersonation Playbook
A new wave of attacks is quietly abusing everyday collaboration tools to…
Thanks for sharing Saugata.
I followed the process and successfully got up to Demo 6, but after that I got a secure boot error.
I’m trying to set up Win 2016 TP 5 Desktop Experience on the 2nd partition (d:) of an SSD in a Lenovo laptop. I have disabled secure boot in the BIOS and confirmed that none of the volumes are GPT.
I haven’t tried bringing it up in Hyper-V using the existing 8.1 OS in c: partition.
I don’t want to wipe out
Any ideas.
This process will not wipe out your existing OS coz you are not installing this on your HDD, you are just modifying the boot loader to boot the OS from VHD. All modern OS from Windows 7 support this features.
Note: I have also used Lenovo S510p laptop for this setup, only difference is i don’t have SSD.
I will update this post with the process of how to restore old boot loader shortly.